All the Information You Need to Install, Clean, and Replace Dryer Vent Hoses for Maximum Safety
A dryer venting pipe is an important element of any dryer set-up designed to let out heat and dust outside without risk. Fire hazards, mold and higher energy costs all stem from moisture which is not adequately ventilated. This article will explain all you need to know about your dryer’s venting hose is crucial and how to select the best one and how to set it up it, clean or change it. The hoses range from foil-flex, to rigid metal ducts, each has pros and pros and. Knowing when it is time to clean or replace the vent hose can help your dryer to run better as well as last longer and also ensures your safety.
Table of Contents
What Makes the Dryer Vent Hose Crucial?
The dryer’s vent pipe isn’t simply a connector. It’s a security feature. Without it steam and dust will remain within your home, thereby which increases the chance of fire or mold. A proper ventilation system ensures that your dryer operates efficiently and does not overheat. Also, it reduces energy consumption in drying and time. A properly functioning vent hose safeguards your appliances and home, which makes it an essential element of maintaining your home regularly.
Typical Types
There are a variety of dryer venting hoses, each with its own pros and cons
- Foil Flex Hose is flexible and moderately priced, but it is less durable and more susceptible to breaking.
- Semi-Rigid Hose: Delivers more quality and airflow, making it suitable for the majority of homes.
- Rigid Metal Duct Most efficient, but it’s less flexible, making it ideal for long-term installation.
- Plastic Hose It is not recommended due the risk of fire and the codes of construction restrictions.
- Always select the safest and best-suited kind for your home.
Making the Correct Decision
To select the most suitable dryer line for you, think about these factors:
- Length and Space: Less straighter hoses increase airflow.
- Material: Select metal ducts, semi-rigid or rigid, for safety and long-lasting.
- Compatibility: Check that the dryer’s wall vent in a proper way.
- Local Codes: Use hoses which conform to safety and construction requirements.
- Utilization requirements: For heavy use, pick hoses that are durable that have secure connections.
These tips help ensure an efficient and safe dryer operation.
How Can I Install It?
Steps in Preparation
Remove the plug from your dryer, and remove it from the wall prior to connecting a vent pipe for the dryer. Be sure to have clamps, a screwdriver and the right hose size. Find the distance between your dryer and the vent on the wall. Reduce the hose, if necessary. Remove any dust or lint from the outlet for exhaust to prevent clogging. This will ensure an easier, safer and quicker installation with less problems in the future.
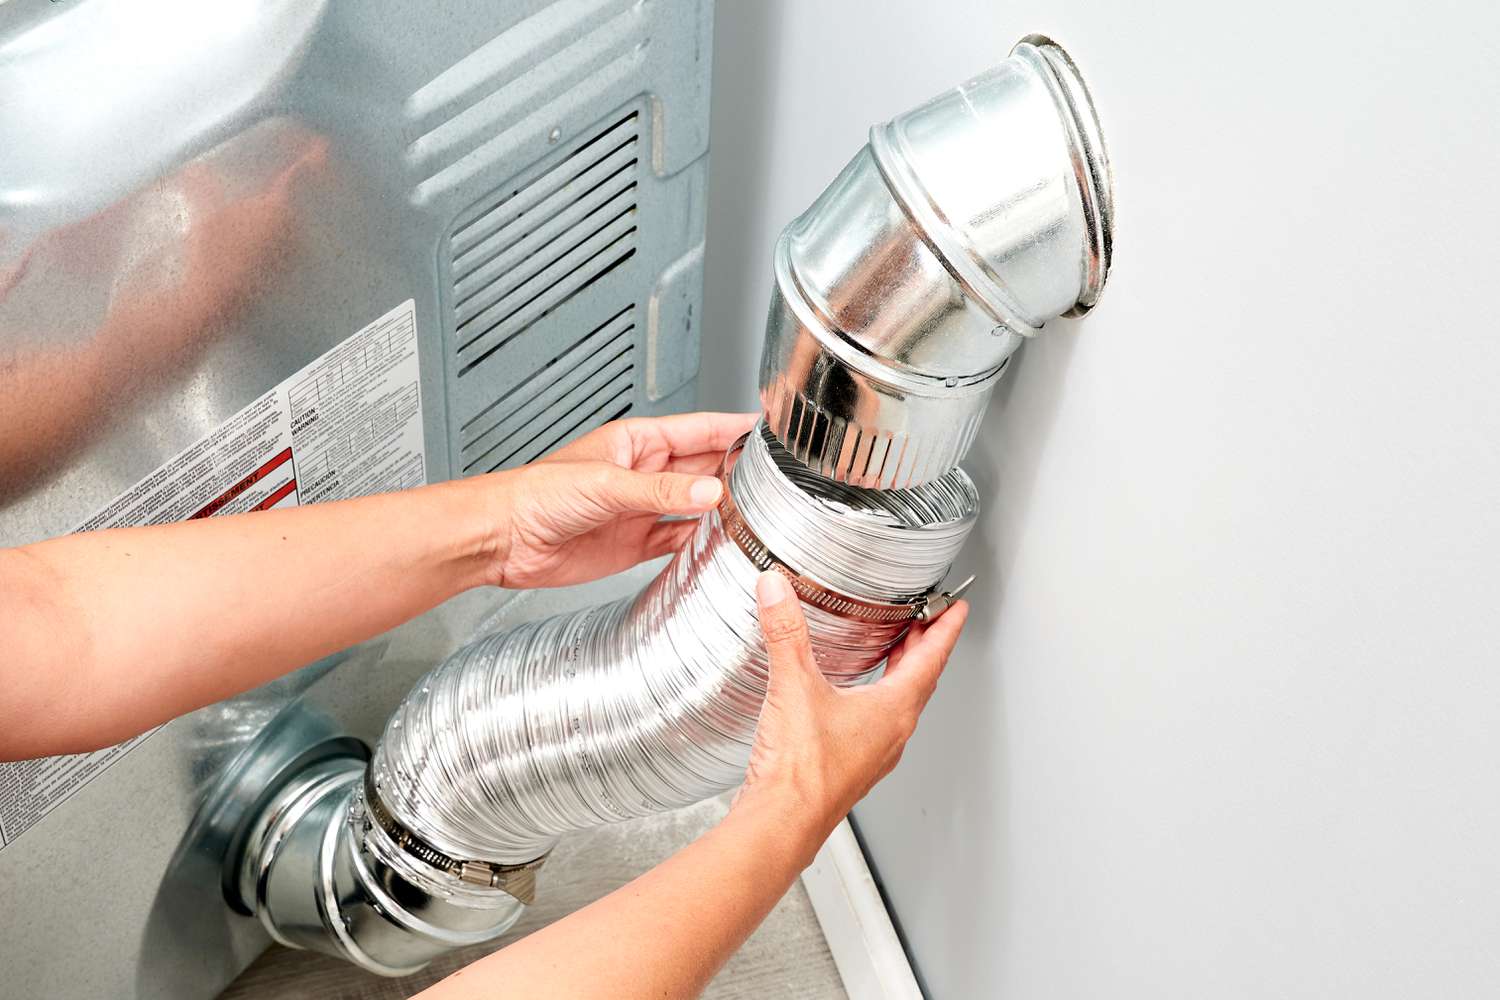
Procedure for Installation
Attach the vent pipe for dryer by using clamps after connecting an end of the pipe to vent port. The other side is connected of the pipe to the floor vent or wall with clamps. Be sure that the hose is free of no bends or kinks that can block the flow of air. The more straight and shorter the hose will be, the better dryer’s performance. After installation connect the dryer and measure airflow at the vent’s outside area.
Tips for Cleaning and Maintenance
To keep the hose clean
To clean the dryer vent hose, disconnect the dryer and remove the vent hose at both ends. Make use of a vacuum cleaner or vent brush to clean the lint and dirt from the inside. Clean out the vent flaps on the outside also. If you notice a thick buildup, soak your pipe in soapy water. Dry it completely before reconnecting. A regular cleaning every six months boosts dryer efficiency and reduces energy consumption and can help prevent fire hazards due to the buildup of lint.
Indications That It Needs Cleaning
Common indicators that your dryer’s vent needs to be cleaned are long drying times, clothes that are hot, but wet, or lingering smell. There may also be dust accumulating around the dryer or on the outside vents. A blocked hose will strain the dryer, causing wear and energy expenses. If you observe any of these indicators Clean the hose as soon as you notice it to prevent any safety hazards and to restore dryer efficiency within your laundry area.
When Should I Replace It?
You must change the hose that connects your dryer when it’s damaged, cracked or blocked, or is constructed from a hazardous material such as plastic. There are signs of a reduced efficiency in the dryer as well as excessive heat, and evident lint build-up. If your hose is older then five years old think about replacing it with a stainless steel alternative. Making the switch to a semi-rigid or rigid hose can improve security, airflow, as well as efficiency of energy. Regular inspections allow you to spot problems early, before they become more serious.
Conclusion
In the end, a dryer venting hose is much more than a simple accessory. It’s vital for security as well as energy efficiency and dryer performance. Selecting the correct type, properly installing it and regularly maintaining it can help avoid fire hazards, cut down on wear, and help save energy. If you’re replacing an old hose or installing a brand new one, making sure you have the proper ventilation will protect your house and your appliances. You can make your dryer more secure and more efficient with the correct dryer venting hose.